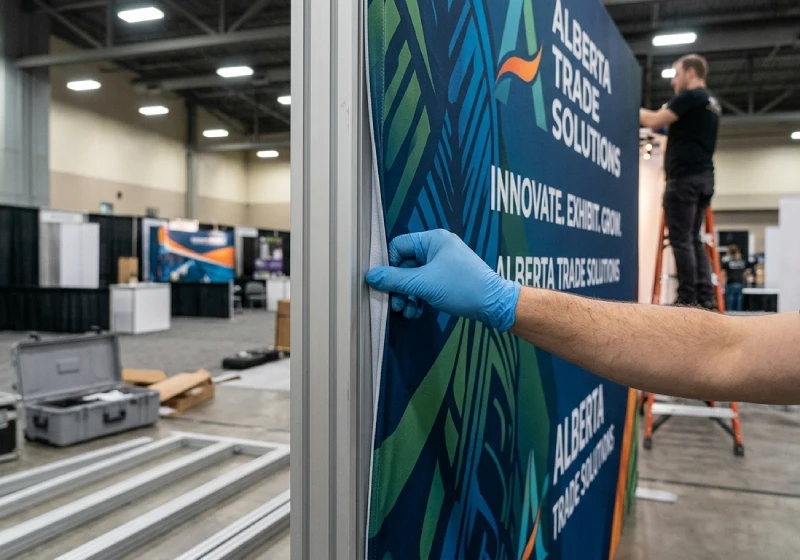
The Alberta trade show calendar is a compressed window. From late September through November, the oil and gas conference circuit, agricultural shows, professional association conferences, and industry-specific expos land one after another. NANOG, Agri-Trade, the Edmonton Home and Garden Show preparations, FHCA- all companies that exhibit at multiple shows in this window are working against a tight timeline with no slack between events.
The companies that do this well start in August. They confirm booth dimensions, brief their sign company, and have design proofs in hand by September 1. Everything is ordered, produced, delivered, and inspected before the first show date. The companies that struggle start in mid-September, pay rush fees, make compromises on materials and design, and show up on day one of the expo with a booth that doesn’t represent the business accurately.
This checklist is structured for the planners. It covers every graphic element a standard trade show booth needs, in the order you should address them, with the lead times that govern whether you’re comfortable or scrambling.
Why Fall Is Trade Show Season in Alberta
Alberta’s industry conference and trade show calendar concentrates in fall for a combination of reasons: the oil and gas sector’s fiscal planning cycle drives fourth-quarter conferences where procurement decisions are made, agricultural shows run post-harvest, and professional associations schedule their annual conferences after the summer. The result is that most Alberta B2B and industrial exhibitors face two to four shows between September and November, each requiring a version of the same graphic package.
Understanding this concentration matters for planning. If your company exhibits at three fall shows in succession, the graphics that perform well at the first show need to be in your possession by early September. That means the design needs to be approved, the order needs to be placed, and production needs to be complete by the end of August. Working backward from a September 15 show date with a four-to-six week production lead time means starting the design process no later than the first week of August.
The 8-Week Trade Show Prep Timeline
Working backward from the show date, here is the schedule that keeps you comfortable:
- 8 weeks out: Brief your sign company with the booth dimensions and the show’s exhibitor rules (including ceiling height limits, back wall height restrictions, and hanging sign permissions). Begin the design process. Confirm which graphic elements you need: if you exhibited last year, decide what needs to be updated and what can be reused.
- 6 weeks out: Finalize all design files. Review proofs carefully for text accuracy, since trade show graphics are not inexpensive to reprint, and a booth with a wrong phone number or outdated product name runs for the full show duration. Approve the final proof explicitly in writing; verbal approvals cause problems.
- 4 weeks out: All orders should be confirmed and in production. This is the latest comfortable production start for most booth graphic elements. Rush production is available but adds cost and removes your safety margin for addressing issues.
- 2 weeks out: All pieces should be in your possession. Unpack everything, inspect it, and test the banner stand mechanisms. Confirm that the back wall fits within the show’s height limit. Identify any issues while you still have time to address them.
- 1 week out: Pack everything with a checklist. Label each case or tube with its contents. Confirm delivery or travel arrangements for getting the booth to the venue. Bring the show’s exhibitor rules document with you; if a floor manager questions a piece during setup, having the rules on hand resolves the issue quickly.
Trade Show Booth Graphics Checklist: What Every Booth Needs
The graphic elements for a standard 10×10 or 10×20 trade show booth fall into four categories: the back wall, banner stands, table elements, and floor and overhead items. Each serves a different visual function in the booth environment.
The Back Wall: Fabric Backdrop or Pop-Up Display
The back wall is the most important single graphic investment in a trade show booth. It is the largest surface area, the first thing a visitor sees when approaching from across the floor, and the background of every photograph taken at the booth, including the social media photos your company will post and the photos media attending the show will capture.
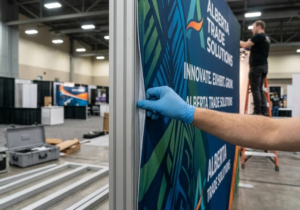
Fabric tension displays are the current industry standard for back wall displays. The frame is a lightweight aluminum extrusion system; the graphic is a dye-sublimated fabric with a silicone strip sewn around the edge that presses into the frame groove. The result is a perfectly taut, seamless fabric graphic with excellent print quality. The system packs into a carry bag, sets up in minutes, and the fabric graphic can be replaced without replacing the frame hardware. These systems are available in sizes from small tabletop formats to full 10-foot-wide back wall systems.
Pop-up frame displays are the older format, with a concertina frame that expands from a compact folded position, with magnetic graphic panels attached to the face. They are more durable than fabric systems for high-frequency use but produce a visible seam between panels and cannot match the print quality of modern dye-sublimated fabric. For exhibitors who have a pop-up display that still works and want to refresh it, graphic panel replacement is available; for new purchases, fabric SEG is generally the better investment.
Banner Stands for Trade Shows
Retractable banner stands serve as supplementary displays that extend the booth footprint, flank a table display, or create a separation between your booth and the adjacent exhibitor. They set up and break down in under 60 seconds, weigh approximately 4 kilograms, and travel in a compact carry bag, which is an important advantage for exhibitors who fly to shows or who are moving between multiple show locations in the same week.
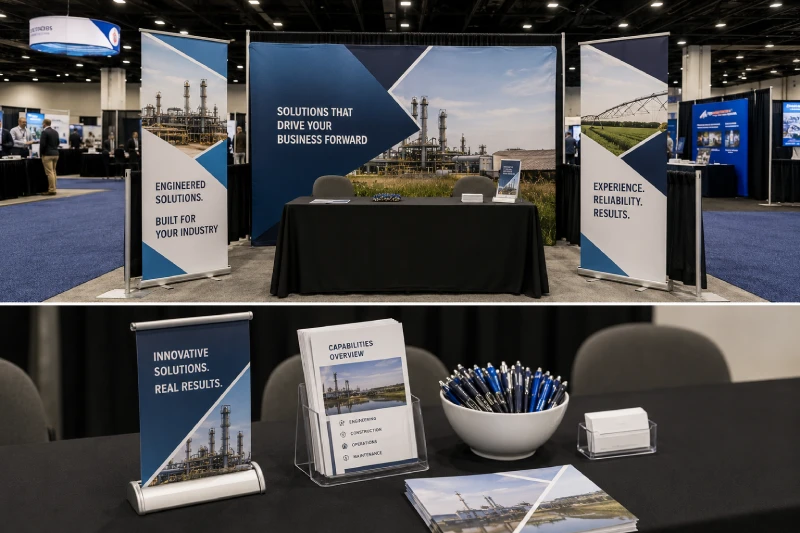
Standard 33″ x 80″ retractable banner stands are the most common format. For flanking positions beside a 10-foot back wall, two stands at the front corners of the booth frame the space and extend the visual footprint beyond the back wall alone. For corner booth configurations, double-sided banner stands visible from two aisles maximize the visual impact from additional directions. For large-format impact in a 10×20 booth, wider 47″ or 60″ stands cover more horizontal width with fewer units.
Table Covers and Tabletop Displays
A full-coverage branded table throw is one of the highest value-to-cost items in a trade show booth. An unbranded folding table looks provisional; a fitted printed table cover that carries your logo and brand colors looks established. It is also practically useful: it hides storage under the table, creates a consistent visual surface, and provides a clean background for product displays on top of the table.
Tabletop retractable banner stands are useful in environments where only a table is provided rather than a full booth space, common at smaller industry conferences and professional association meetings. An L-shaped counter display with integrated shelving handles product sampling or demonstration, providing both a surface and vertical branded display in a compact footprint.
Flooring and Overhead Elements
Branded floor mats and interlocking carpet tile systems define the booth footprint visually and distinguish your space from the bare concrete or generic carpet of the show floor. They are not essential for every booth but contribute meaningfully to the overall polish of larger or higher-investment exhibit spaces.
Hanging overhead signs require advance confirmation with the show organizer. Many show floors restrict or prohibit overhead elements due to ceiling height, rigging weight limits, or fire suppression system clearances. For shows where hanging signs are permitted, an overhead presence provides visibility from across the show floor that back wall displays cannot match. The incremental cost is significant (rigging fees plus production) and is typically only justified for larger booth investments at major industry shows.
Print Collateral for Trade Shows: Giveaways and Leave-Behinds
Physical materials that leave the booth with visitors complete the graphic package. The case for restraint here is strong: a single well-designed one-page capability overview that a visitor will actually read performs better than a four-color brochure suite that goes directly into the conference bag and never comes out.
The most effective leave-behind format is a single-page or bifold piece that captures the essential value proposition, the key product or service categories, and a clear contact CTA. A QR code on the piece that links to a landing page with more detail bridges the physical-to-digital handoff, allowing you to track show-generated engagement in your digital analytics. Business cards remain essential; ensure the stack is visible and accessible throughout the show without requiring a visitor to ask for one.
Branded giveaways — pens, notebooks, tote bags — generate goodwill and keep your name visible after the show, but their value is proportional to their quality. An inexpensive pen that stops working the first week communicates something you don’t want communicated. If you are doing branded merchandise, choose a smaller number of quality items over a larger assortment of generic ones.
Expo Display Planning: Before You Finalize the Order
Several planning questions prevent expensive mistakes that cannot be fixed on the show floor.
Confirm booth dimensions before ordering the back wall. Show floor configurations sometimes differ from the dimensions in the exhibitor kit, and a back wall that is six inches wider than the booth space creates a setup problem on day one. Measure the actual space if you can; if not, stick to the dimensions specified in the official exhibitor manual.
Confirm back wall height limits. Many shows restrict back wall height to 8 feet in standard inline booths to protect sightlines for neighboring exhibitors. A back wall produced to 10 feet for a venue with an 8-foot rule will not be permitted as displayed, and you will either need to remove the upper section or fold it, neither of which is a good outcome.
Confirm hanging sign permissions in writing from the show organizer before ordering. Rigging fees at major Alberta venues can be $500 to $2,000 per element, and a hanging sign that is not permitted after production is an expensive waste. When in doubt, design your booth without relying on an overhead element.
FAQ
- How far in advance should I order trade show graphics? – Order all trade show graphics at least four to six weeks before the show date. This allows time for design approval, production of all elements, delivery inspection, and a buffer to address any issues before shipping to the venue. For first-time exhibitors or for booths with multiple custom elements, eight weeks is a more comfortable timeline. Rush production is available for most graphic types but adds cost and removes the safety margin for addressing errors or reprints.
- What is the most important graphic element in a trade show booth? – The back wall backdrop is the most important single graphic investment in a trade show booth. It is the largest surface area, the first thing visitors see when approaching, and the background for every photo taken at the booth. A professionally designed back wall with a clear logo, one compelling visual, and a readable tagline does more for booth performance than any other individual element. If budget forces a trade-off, invest in the back wall first and supplement with banner stands as budget allows.
- Can I reuse trade show graphics from year to year? – Yes. Fabric SEG frame systems and retractable banner stand hardware are designed for indefinite reuse, and only the printed graphic inserts need to be replaced when messaging changes. Back wall graphics typically remain current for two to three show cycles before message currency or print quality becomes an issue. Plan for periodic graphic refreshes on a two- to three-year cycle rather than treating the initial purchase as either permanent or one-time use.
- What size banner stands do I need for a 10×10 trade show booth? – For a standard 10×10 booth, two 33″ x 80″ retractable banner stands work well as flanking displays beside the main back wall. If using banner stands as the primary display without a back wall, three 33″ stands placed in a row cover approximately 8 to 9 feet of combined width, depending on spacing. Wider 47″ or 60″ banner stands reduce the number of units needed to cover the same width at a slightly higher per-unit cost.
- What graphics should I bring for a trade show table display? – For a tabletop setup where only a six-foot table is provided, prioritize a full-coverage branded table throw, one tabletop retractable banner as a vertical display behind the table, and a tabletop popup or easel display for key messaging. Organize printed literature in a holder rather than stacking it loose; an organized table surface looks intentional. One bold graphic element pulls more attention than a table covered with scattered brochures.